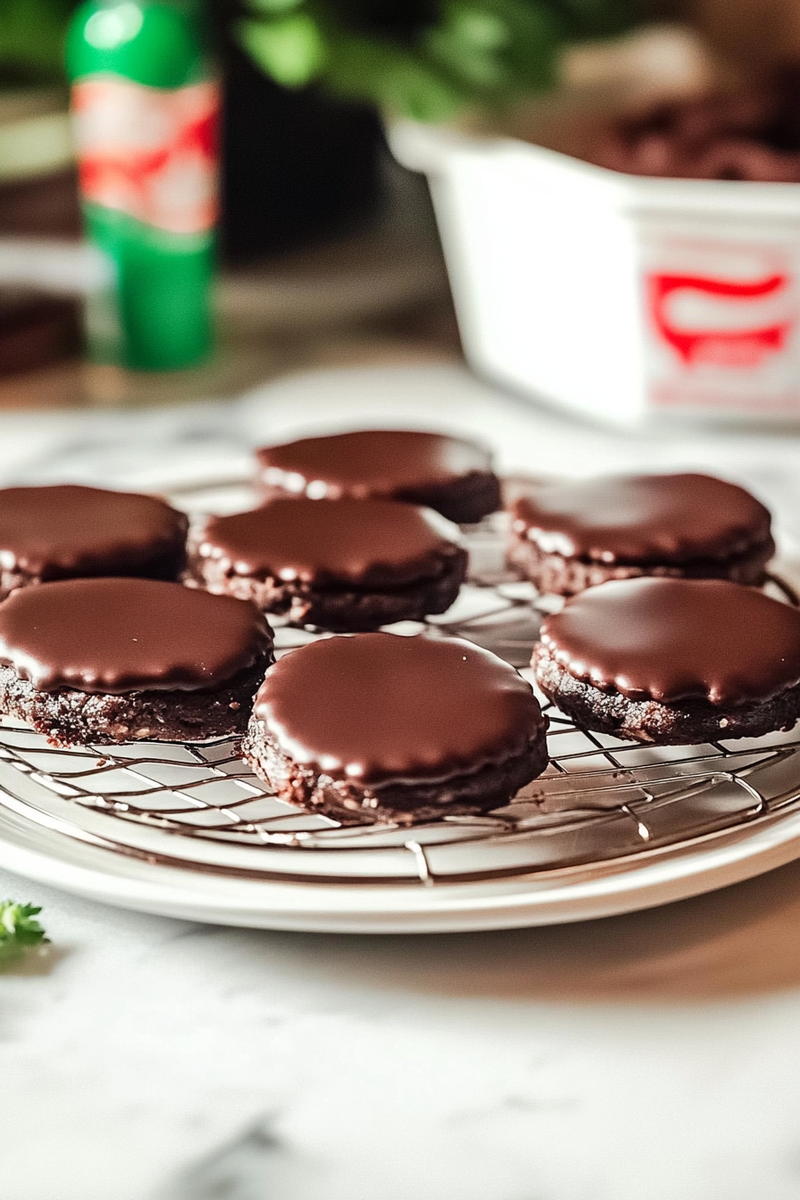
Introduction and Quick Summary
If you’re a fan of refreshing flavors and sweet treats, this recipe for Homemade Peppermint Patties is perfect for you. These delightful candies combine the coolness of peppermint with rich chocolate, creating a stunning contrast that tantalizes your taste buds. Best of all, making them at home is simple and rewarding. You can customize the sweetness and texture to suit your preferences without the preservatives found in store-bought versions.
The process of creating these delicious morsels involves mixing a few basic ingredients to form a smooth filling before coating them in melted chocolate. Kids and adults alike will love these treats, making them an excellent choice for parties, holiday gifts, or just because!
In this article, I’ll guide you through the essential ingredients needed for crafting your own peppermint patties. Then we’ll dive into step-by-step instructions that ensure your success in the kitchen. Finally, I’ll share some serving suggestions and storage tips so you can enjoy your homemade creations long after making them. Get ready to impress friends and family with your candy-making skills!
Main Ingredients
Sweetened Condensed Milk
Sweetened condensed milk acts as the base for your peppermint patties. This thick and creamy ingredient provides the necessary sweetness while also helping bind the mixture together. For this recipe, you will need 1 cup of sweetened condensed milk. This will help create a smooth filling that pairs perfectly with chocolate.
Powdered Sugar
Next up is powdered sugar—also known as confectioners’ sugar—which gives structure to the filling. You will need about 4 cups of powdered sugar for this recipe. When combined with the sweetened condensed milk, it forms a thick dough that can be easily shaped into discs or patties.
Peppermint Extract
To achieve that signature minty flavor in your homemade peppermint patties, peppermint extract is essential. You’ll only need 1 teaspoon of pure peppermint extract to infuse your filling with a refreshing taste. This ingredient makes all the difference in creating that classic mint flavor that pairs beautifully with chocolate.
Semi-Sweet Chocolate Chips
For coating our patties, semi-sweet chocolate chips are ideal due to their rich flavor and smooth melting properties. You’ll require 2 cups of semi-sweet chocolate chips for this recipe. When melted and dipped around the mint filling, they create a luscious outer layer that perfectly complements the coolness inside.
Coconut Oil
Coconut oil adds a touch of creaminess when melting the chocolate chips while also helping them set nicely on your patties. Using about 2 tablespoons of coconut oil will help achieve a glossy finish on your chocolates once they have cooled down.

How to Prepare Homemade Peppermint Patties
Step 1: Prepare Your Work Area
Before starting the preparation of your homemade peppermint patties, ensure your work area is clean and organized. Clear off any clutter from countertops and gather all ingredients mentioned previously along with measuring cups and bowls. It’s also wise to line two baking sheets with parchment paper to place your finished patties on later.
Start by measuring out 1 cup of sweetened condensed milk into a large mixing bowl followed by adding 4 cups of powdered sugar gradually while stirring continuously until well combined. The mixture should become thick enough to handle but still pliable enough to shape into discs.
Step 2: Flavoring Your Filling
Once you’ve combined the sweetened condensed milk and powdered sugar thoroughly, it’s time to add flavor! Measure out 1 teaspoon of pure peppermint extract; then pour it into the mixture while folding it gently using a spatula or wooden spoon until evenly distributed throughout.
After incorporating the extract completely into your filling mixture, check its consistency; it should be firm yet moldable without being sticky or too dry at this stage.
Step 3: Shaping The Patties
Now comes one of the most fun parts—shaping those delicious fillings! Take small portions (about 1 tablespoon each) from your mixture and roll them into balls between your palms before pressing down slightly onto lined baking sheets forming flat discs about half an inch thick.
Continue shaping until all dough has been used up; you should have around 30-35 patties ready for chilling! Once you’ve shaped them all accordingly, place baking sheets in the refrigerator for approximately 30 minutes or until firm enough to dip into melted chocolate without losing their shape.
Step 4: Melting The Chocolate Coating
While waiting for those mint-filled discs to chill properly, prepare the semi-sweet chocolate coating next! In a microwave-safe bowl or double boiler method—using medium heat—melt together 2 cups of semi-sweet chocolate chips along with 2 tablespoons coconut oil until completely smooth stirring occasionally throughout.
Once melted evenly without lumps remaining use caution when removing from heat allowing it cool slightly before dipping chilled discs so they won’t melt away during coating!
Step 5: Dipping & Setting The Patties
With melted chocolate ready now take each chilled patty one by one; dip each side completely ensuring they’re covered entirely before placing back onto prepared parchment-lined sheets again afterward repeating until all are coated properly!
After dipping all patties allow excess drips fall off gently wiping away any residue along edges using fingers if necessary then set aside at room temperature or refrigerate once more allowing them fully harden before serving which usually takes around an hour depending on conditions!

Serving and Storing Tips
Serving Suggestions
Once your homemade peppermint patties have fully set up after cooling down nicely—presenting them elegantly makes all difference during gatherings! Consider arranging finished candies on decorative platters garnished with fresh mint leaves showcasing vibrant colors capturing attention instantly among guests at parties or events held indoors/outdoors alike!
Another fun idea involves pairing these delightful sweets alongside hot cocoa marshmallows served warm during winter festivities offering delightful treats everyone can enjoy together while keeping spirits high amidst chilly weather outside!
You may also want consider gifting these beautiful home-made goodies wrapped neatly inside clear bags tied off with ribbons acting as thoughtful presents towards loved ones celebrating birthdays holidays anniversaries showcasing how much effort went into preparing such special treats just for them!
Storing Your Patties Properly
To keep those tasty homemade peppermint patties fresh longer storing correctly matters significantly after preparing! Place cooled leftovers inside an airtight container lined bottom & sides using wax paper preventing potential sticking against surfaces ensuring nothing gets damaged over time while preserving flavors intact when stored correctly!
Store away containers within fridge ideally lasting anywhere between two weeks up three weeks maximum if kept sealed right maintaining optimal freshness enjoying every bite tasting like first made even days later without losing quality whatsoever ensuring satisfaction every time indulged upon!
For even longer storage options freeze batches individually wrapped tightly avoiding moisture getting through ensuring nothing ruins delightful taste experience whenever pulled out enjoying just like freshly made day they were created savoring rich flavors present throughout each bite taken delightfully indulgent every moment shared together!
Mistakes to avoid
When making homemade peppermint patties, several common mistakes can compromise the final result. One major mistake is not using enough peppermint extract. This ingredient is pivotal for achieving that classic cool flavor. If you skimp on it, the patties may taste bland and unappealing. Start by measuring precisely; a good rule of thumb is to begin with the recommended amount in your recipe and adjust according to personal taste.
Another frequent error is neglecting the chocolate coating. Many people rush this step or use low-quality chocolate, which affects the overall texture and flavor. Opt for high-quality dark chocolate for a richer taste and smoother finish. Tempering the chocolate properly will create a shiny surface and prevent it from becoming dull. Take your time during this step, as it makes a significant difference.
People also often overlook chilling their ingredients adequately before assembling the patties. If the filling is too warm when you dip it in chocolate, it might melt, causing an uneven coating or even creating a mess. Make sure to chill both the filling and the dipped patties to set them correctly.
Lastly, avoid rushing through the cooling process after dipping your homemade peppermint patties in chocolate. This can lead to uneven setting or a sticky finish. Allow them ample time in the fridge to firm up properly before serving or storing.

Tips and tricks
Creating delicious homemade peppermint patties can be easier with a few handy tips and tricks in mind. First, consider using powdered sugar instead of granulated sugar for your filling mixture. Powdered sugar blends better and results in a smoother texture, making your patties more enjoyable.
Another useful tip is to use a silicone mat when shaping your patties. This non-stick surface helps prevent sticking issues and makes it easier to form uniform shapes without having to dust your workspace with additional powdered sugar or flour.
It’s beneficial to chill your dough before cutting out individual pieces as well. A firmer dough is much easier to work with; this helps maintain shape and prevents melting during the dipping process. Simply wrap your dough tightly in plastic wrap and refrigerate for about 30 minutes.
When it comes time to dip your patties in chocolate, use a fork for better control. This technique allows excess chocolate to drip away more efficiently without leaving too much residue on the patty itself. Additionally, tapping lightly on the side of your bowl can help remove any excess chocolate easily.
Finally, don’t forget about presentation! Consider garnishing your homemade peppermint patties with crushed candy canes or drizzling some white chocolate on top for added flair. Not only does this enhance visual appeal but also adds an extra layer of flavor that complements the peppermint nicely.
Suggestions for Homemade Peppermint Patties
To make your homemade peppermint patties even better, start by experimenting with different types of mint extracts beyond traditional peppermint flavoring. Spearmint can provide a unique twist that may surprise your taste buds while still maintaining that refreshing quality you expect from these treats.
Consider incorporating various coatings besides standard dark chocolate as well. Milk chocolate offers a sweeter alternative, while white chocolate adds creaminess that pairs wonderfully with minty flavors. You could even mix chocolates for an exciting new taste combination.
Using natural coloring agents like spirulina powder or beet juice can add visual interest without artificial additives if you’re looking to impress guests with vibrant colors in addition to rich flavors.
Pay attention to storage methods too; keep your homemade peppermint patties stored in an airtight container at room temperature if consumed quickly but refrigerate them if you plan on saving them longer than a week. Proper storage helps maintain optimal freshness and texture over time.
Lastly, think about pairing these delightful treats with beverages such as hot cocoa or tea during colder months for an enjoyable experience that enhances their minty essence while providing warmth on chilly days.

FAQs
How long do homemade peppermint patties last?
Homemade peppermint patties typically last about one week when stored at room temperature in an airtight container. If you want them to last longer, consider refrigerating them; this can extend their freshness up to three weeks or even longer if frozen properly. Just ensure they are well-wrapped or placed in a suitable container to prevent freezer burn or absorbing odors from other foods.
Can I use different types of chocolate for coating?
Absolutely! While dark chocolate is traditional for creating rich flavors, feel free to experiment with milk or white chocolate as well. Each type offers its own unique sweetness and creaminess that can complement the refreshing minty flavor of homemade peppermint patties beautifully.
What should I do if my filling is too sticky?
If you find that your filling is overly sticky while preparing homemade peppermint patties, simply incorporate more powdered sugar until you reach a workable consistency. Adding small amounts gradually ensures that you won’t compromise texture while achieving a smooth mix suitable for shaping into patties.
Is there a vegan option available for this recipe?
Yes! To create vegan homemade peppermint patties, substitute regular butter with plant-based alternatives like coconut oil or vegan margarine while ensuring no dairy products are included in your chosen chocolate coating either—look for brands specifically labeled as vegan-friendly.
Can I make these ahead of time?
Definitely! Homemade peppermint patties are perfect for making ahead of time since they store well when kept properly sealed either at room temperature or refrigerated depending on how soon you plan to consume them—prepping them days prior saves valuable time during busy occasions like holidays!
How do I know when my chocolate is tempered correctly?
Properly tempered chocolate should have a glossy appearance without any streaks when cooled down once dipped around room temperature before setting fully after cooling—this method ensures smooth dipping results without any unsightly surface issues making each bite enjoyable!
Conclusion
Making homemade peppermint patties provides not just tasty treats but also opportunities for creativity in both flavors and presentation techniques. Remember key points such as using high-quality ingredients like fresh mint extract and premium chocolates while avoiding common pitfalls like rushing through chilling processes or neglecting proper storage methods post-preparation!
By following outlined tips alongside suggestions provided here including experimenting with coatings beyond basic options plus keeping track of expiration timelines—your delightful confections will surely impress friends family alike throughout any festive gathering year-round! Enjoy crafting these minty delights today!

