Introduction and Quick Summary
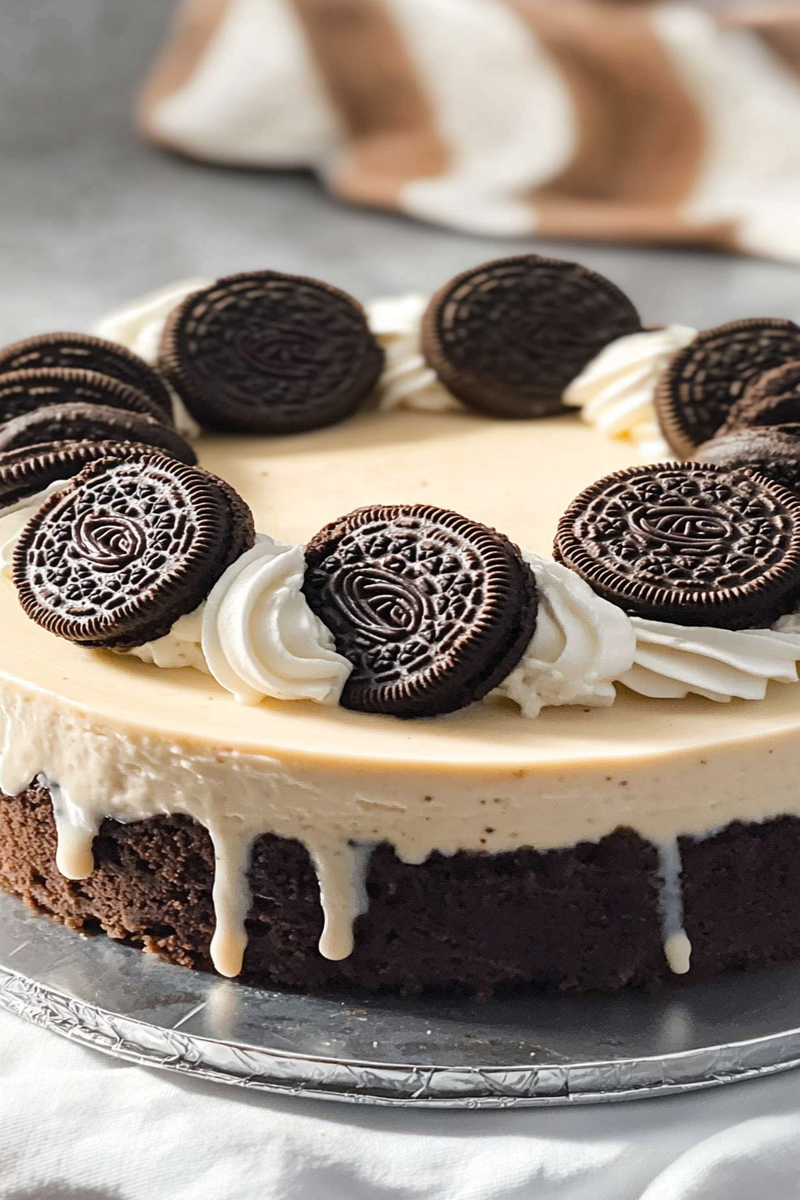
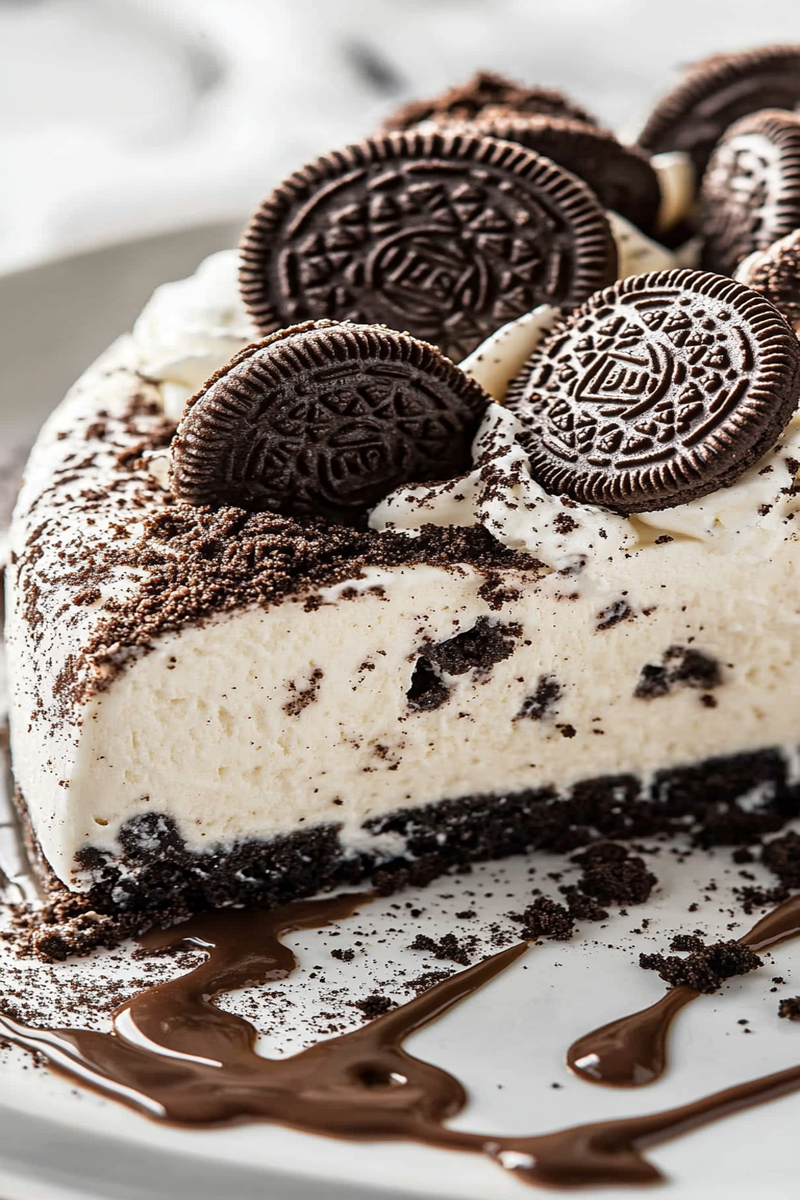
Oreo cheesecake is a delightful dessert that combines the rich flavors of cream cheese with the beloved taste of Oreos. This decadent treat is not only easy to make but also perfect for any occasion, from family gatherings to birthday parties. Imagine diving into a creamy slice of cheesecake infused with crushed Oreos and a buttery crust made from whole cookies. This recipe will guide you through preparing an irresistible Oreo cheesecake that will impress your friends and family.
In this article, you will learn about the main ingredients needed to create this delectable dessert. I will provide step-by-step instructions to ensure you can recreate this masterpiece in your own kitchen. Finally, I’ll share some serving and storing tips to help you enjoy your creation at its best. Whether you’re an experienced baker or a novice in the kitchen, this Oreo cheesecake recipe is simple enough for anyone to follow. Prepare yourself for a sweet adventure that begins with just a few key ingredients and ends with an unforgettable dessert experience!
Main Ingredients
Cream Cheese
Cream cheese serves as the primary base for the Oreo cheesecake filling. You will need 16 ounces (two packages) of full-fat cream cheese, softened at room temperature. The creaminess of the cheese helps to create a smooth texture that balances perfectly with the crunchy cookie crust. Make sure it’s softened so that it blends easily with sugar and other ingredients without lumps.
Sugar
For sweetness, you’ll need 1 cup of granulated sugar. Sugar not only adds sweetness but also contributes to the overall texture of the filling by helping it become smooth when mixed with cream cheese. It’s essential to mix well until the sugar completely dissolves into the cream cheese mixture.
Heavy Whipping Cream
To achieve a light and airy texture in your cheesecake filling, include 1 cup of heavy whipping cream. When whipped until stiff peaks form, it adds volume and richness to your cheesecake while making it incredibly creamy. Be sure to use heavy cream for the best results; lighter options may not hold up as well.
Oreos
You will need 24-30 Oreos for both the crust and filling; crushed Oreos enhance flavor throughout your dessert. Reserve some crushed pieces for garnish on top if desired. The combination of chocolate cookies with creamy filling creates layers of nostalgia in every bite.
Unsalted Butter
To bind your crust together, use ½ cup (1 stick) of unsalted butter, melted. Mixing melted butter with crushed Oreos creates a cohesive texture that holds shape once cooled in the refrigerator. Unsalted butter allows you to control salt levels in your dessert.

How to Prepare Oreo Cheesecake
Step 1: Prepare Your Ingredients
Before starting on your Oreo cheesecake journey, gather all ingredients listed above on your countertop. Begin by preheating your oven to 325°F (160°C). Although this specific recipe does not require baking once assembled (it is more like a no-bake version), preparing all elements ahead ensures a smoother process during assembly.
Step 2: Make the Crust
Start by crushing around 24 Oreos into fine crumbs using either a food processor or by placing them in a zip-top bag and smashing them with a rolling pin. Once you have fine crumbs, transfer them into a mixing bowl and combine them with melted unsalted butter until fully incorporated.
Next, press this mixture firmly into the bottom of a springform pan or any round cake pan lined with parchment paper—ensuring an even layer across the base while packing it tightly downwards so it holds well once chilled.
Place this crust in the refrigerator for about 10 minutes to set while you prepare the filling.
Step 3: Create Your Filling
In another mixing bowl, beat together softened cream cheese and granulated sugar using an electric mixer on medium speed until smooth and fluffy—this should take about two minutes. Next add heavy whipping cream gradually while continuing to beat on low speed until combined properly—do not overmix as we want our mixture light yet stable!
Finally fold in half of the reserved crushed Oreos gently using a spatula until they’re evenly distributed throughout the batter without losing too much airiness from whipping earlier.
Step 4: Assemble Your Cheesecake
Once combined thoroughly pour half of your cheesecake filling onto the prepared cookie crust evenly spreading it outwards towards edges—gently tap downwards so there are no air pockets left inside! Add remaining filling layer on top smoothing out again while ensuring everything is level before sprinkling remaining crushed Oreos over surface area generously.
Cover tightly using plastic wrap or foil before placing into refrigerator for at least four hours or overnight if possible—this allows flavors meld beautifully while setting properly within its cool confines!

Serving and Storing Tips
Serving Suggestions
When ready to serve your delicious Oreo cheesecake after chilling time has passed remove from fridge carefully—run knife along edge between pan sides gently loosening any sticking points before unclasping springform sides altogether revealing beautiful layers inside! For cleaner cuts use hot water dipped knife when slicing each piece—it helps glide effortlessly through creamy texture without disrupting presentation too much!
Consider garnishing slices further by drizzling chocolate sauce over top or dolloping whipped cream beside each slice alongside more crushed Oreos sprinkled atop if desired! Serve chilled for optimal enjoyment alongside beverages like coffee or milk which complement flavors seamlessly enhancing overall experience greatly!
Storage Instructions
If you have leftover slices after serving don’t fret—you can store them easily! Place any remaining pieces back into their original springform pan covered securely with plastic wrap or aluminum foil before returning them back into refrigerator where they’ll stay fresh up till five days later maximum due storage limitations due dairy content present within ingredients used here!
Alternatively consider freezing individual portions instead by wrapping each slice tightly in plastic wrap followed by aluminum foil sealing closed entirely preventing freezer burn occurring over time allowing preserving flavors intact longer than standard refrigeration methods would allow!
Enjoy every moment indulging yourself guilt-free knowing these tasty treats await whenever cravings strike next time around!
By following these detailed steps along with ingredient breakdowns provided above anyone should feel confident replicating this delightful oreo cheesecake at home successfully achieving satisfying results every single time!
Mistakes to avoid
When making an Oreo Cheesecake, several common mistakes can compromise the final result. One significant error is not allowing the cream cheese to come to room temperature before mixing. Cold cream cheese can lead to lumps in your batter, resulting in a less than smooth texture. To avoid this, take the cream cheese out of the refrigerator at least one hour before you start your recipe.
Another mistake is overmixing the batter after adding eggs. Mixing too vigorously introduces air into the cheesecake, which can cause it to crack during baking. Aim for a gentle mix just until combined and avoid excessive beating. This helps achieve the dense, creamy texture that makes Oreo Cheesecake so delightful.
Not using a water bath is another frequent pitfall. A water bath creates steam in the oven, helping maintain moisture and even heat around your cheesecake. Without it, your cheesecake might bake unevenly or crack on top. If you’re unsure about setting up a water bath, simply place your cheesecake pan inside a larger pan filled with hot water before placing it in the oven.
Lastly, be cautious with cooling times. Removing your cheesecake from the oven too soon can lead to a sunken center as it cools. Allow it to cool gradually in the oven with the door slightly ajar for about an hour before transferring it to the refrigerator. This careful cooling process helps set its structure and keeps it from collapsing.

Tips and tricks
To perfect your Oreo Cheesecake, follow these useful tips and tricks that will enhance your baking experience. Start by choosing high-quality ingredients; this includes fresh cream cheese and authentic Oreo cookies. Using premium ingredients greatly influences flavor and texture, ensuring a rich cheesecake that everyone will love.
When preparing your crust, crush the Oreo cookies finely but avoid turning them into dust. You want some texture for crunchiness without compromising consistency. Use melted butter to bind the crumbs together effectively; this will help create a firm crust that holds its shape when sliced.
Consider chilling your cheesecake overnight instead of just a few hours before serving. This extended chilling period allows flavors to meld beautifully and enhances its overall taste and texture. If you have time, make your cheesecake a day ahead of when you plan to serve it for optimum results.
Presentation matters too! Before serving your Oreo Cheesecake, consider garnishing it with whipped cream or additional crushed Oreos for added visual appeal and flavor contrast. A drizzle of chocolate sauce can also elevate its appearance while providing an extra layer of indulgence.
Finally, if you wish to customize your Oreo Cheesecake further, experiment with different flavored extracts like vanilla or almond in moderation. These small additions can transform your dessert into something uniquely yours without overpowering that classic Oreo taste.
Suggestions for Oreo Cheesecake
To make your Oreo Cheesecake even more enjoyable, consider these suggestions that add variety and excitement to this classic dessert. One popular option is to incorporate additional fillings such as chocolate chips or chunks of Oreo cookies mixed directly into the batter. This technique not only adds texture but also intensifies that beloved cookie flavor throughout every bite.
If you’re looking for a lighter version of this indulgent treat, try substituting part of the cream cheese with Greek yogurt or sour cream. These alternatives provide tanginess while reducing richness without sacrificing taste significantly—perfect for those wanting a slightly healthier dessert option.
Another suggestion is to use different types of Oreos for unique flavors; think peppermint or birthday cake varieties! Each offers distinct tastes that can transform your cheesecake into something incredibly fun and festive while retaining its core characteristics.
For those who enjoy an extra layer of flavor complexity, consider adding a swirl of fruit puree on top before baking or topping with fresh fruit after chilling—strawberries or raspberries pair wonderfully with chocolate flavors!
Lastly, if you want something more adventurous, try making mini cheesecakes in muffin tins instead of one large cheesecake. These bite-sized desserts are perfect for gatherings and allow guests to sample without guilt!

FAQs
What are some variations I can try with my Oreo Cheesecake?
You have plenty of options when it comes to variations on an Oreo Cheesecake! Consider using different flavored Oreos like peanut butter or mint varieties for unique twists on this classic dessert. You may also opt for adding other mix-ins such as chocolate chips or chunks of candy bars like Reese’s Pieces for added texture and flavor complexity throughout each slice.
How long should I chill my Oreo Cheesecake?
Chilling time is essential for achieving that perfect texture! Ideally, you should chill your Oreo Cheesecake overnight in the refrigerator before serving; however, if you’re short on time, aim for at least four hours minimum. Extended chilling allows flavors to blend together beautifully while ensuring optimal firmness so that each slice holds its shape nicely when served.
Can I freeze my leftover Oreo Cheesecake?
Yes! Freezing leftover slices of Oreo Cheesecake is possible if you need longer storage options beyond refrigeration timeframes! Simply wrap individual slices tightly in plastic wrap followed by aluminum foil before placing them into an airtight container suitable for freezing—the double wrapping protects against freezer burn while maintaining flavor integrity during storage periods lasting up to three months!
Why did my cheesecake crack during baking?
A cracked surface may occur due mostly due to overmixing or rapid temperature changes leading up towards baking completion stages! Be sure not only to mix gently once all ingredients have been combined but also cool gradually upon exiting ovens—this method helps prevent sudden shifts resulting in cracks forming across surfaces as they cool down post-baking cycle completion!
Can I use low-fat cream cheese instead?
Absolutely! Low-fat cream cheese works well as an alternative without compromising overall taste significantly when preparing an Oreo Cheesecake recipe! However remember that using full-fat versions usually yields richer textures giving off traditional flavors sought after within original recipes!
How do I know when my cheesecake is done baking?
Determining doneness involves checking set centers lightly shaking pans gently once completed cooking cycles finish up—if centers jiggle slightly while edges appear firm then it’s likely finished cooking processes! Always bear in mind cheesecakes continue cooking once removed from heat source due residual warmth present so be cautious avoiding overbaking scenarios!
Conclusion
In summary, creating an unforgettable Oreo Cheesecake requires attention to detail while avoiding common pitfalls associated with baking this beloved dessert. Remember to let cream cheese reach room temperature beforehand; overmixing should be avoided after adding eggs along with proper utilization of water baths during baking procedures—these steps ensure ideal density alongside smooth textures desired within each slice served!
Implementing helpful tips like quality ingredient selection and allowing sufficient chilling time will undoubtedly elevate overall flavor profiles alongside textural experiences enjoyed by all indulging guests alike! Lastly don’t hesitate exploring creative variations—from alternative cookie choices through additional fillings—finding ways enhancing classic recipes makes every baking adventure worthwhile ultimately leading towards memorable moments shared around tables filled delicious treats across joyful gatherings celebrated among family friends alike!
Print
Oreo Cheesecake
- Total Time: 1 hour 15 minutes
- Yield: Serves 8-10 1x
Description
A creamy, indulgent cheesecake loaded with Oreo cookies throughout, topped with more crushed Oreos. This dessert is a must-try for any Oreo lover, with a crunchy crust and smooth, velvety filling.
Ingredients
For the crust:
- 1 1/2 cups Oreo cookie crumbs (about 15 Oreo cookies, crushed)
- 1/4 cup unsalted butter, melted
For the cheesecake filling:
- 3 (8 oz) packages cream cheese, softened
- 1 cup sugar
- 1 tsp vanilla extract
- 3 large eggs
- 1/2 cup sour cream
- 1/2 cup heavy cream
- 10 Oreo cookies, roughly chopped
For the topping:
- 6 Oreo cookies, crushed
- Whipped cream (optional)
Instructions
- Preheat oven to 325°F (163°C).
- Make the crust: Combine Oreo crumbs and melted butter. Press the mixture into the bottom of a greased 9-inch springform pan, creating an even layer. Bake for 10 minutes, then remove from the oven and set aside.
- Prepare the cheesecake filling: Beat cream cheese and sugar until smooth. Add the vanilla extract and beat again. Add eggs one at a time, mixing well after each addition. Stir in sour cream and heavy cream until combined. Gently fold in chopped Oreos.
- Bake the cheesecake for 50-60 minutes, or until the center is set but slightly jiggly. Turn off the oven and let the cheesecake cool in the oven with the door slightly open for 1 hour. Then, transfer to the refrigerator to chill for at least 4 hours or overnight.
- Top with crushed Oreos: Once the cheesecake is fully chilled, sprinkle crushed Oreos over the top. Optionally, add whipped cream for extra indulgence.
- Serve: Slice and enjoy this decadent Oreo cheesecake!
Notes
- For a stronger Oreo flavor, add more crushed cookies to the filling or crust.
- Ensure the cheesecake is completely chilled before serving for the best texture.
- Prep Time: 15 minutes
- Cook Time: 1 hour

